5 Steps to Implement ISO 17025 Decision Rule โ€“ How to Apply the Decision Rule in a Calibration Results

by gcc-admin-alpha

The international standard for laboratories that perform testing and calibration is ISO 17025. The application of decision rules is an important part of the standard. A set of criteria known as decision rules is used to determine whether or not a measurement result is valid. They are crucial to the laboratory’s ability to produce accurate and reliable results.

We will go over the five steps necessary to implement ISO 17025 decision rules in your laboratory and demonstrate how to incorporate them into calibration results in this blog post.

Step 1: Determine the Decision Rule

Choosing which rule to use is the first step in putting decision rules into action. Decision rules come in a variety of forms, including statistical, regulatory, and metrological ones. The choice of rule will be determined by the nature of the measurement and the requirements of the laboratory.

Step 2: Define the Acceptance Criteria

The acceptance criteria must now be defined following the determination of the decision rule. The limits within which a measurement result is considered valid are known as acceptance criteria. The measurement uncertainty in the laboratory should serve as the foundation for these criteria, which should be established in such a way as to guarantee the accuracy and dependability of the outcomes.

Step 3: Verify the Decision Rule

It is essential to confirm that the decision rule is appropriate for use in the laboratory before putting it into action. A validation study can accomplish this by analyzing a set of calibration results with the decision rule and comparing them to a reference value.

Step 4: Implement the Decision Rule

The decision rule can be used in the laboratory once it has been tested. This includes integrating the standard into the research center’s quality administration framework, preparing staff on the best way to apply the standard, and guaranteeing that the standard is reliably applied across all estimations.

Step 5: Monitor and Review

Last but not least, it is essential to keep an eye on and evaluate how the decision rule is being applied in order to guarantee that it is working and that the laboratory is delivering results that are trustworthy and accurate. This entails reviewing the results of the calibration on a regular basis, ensuring that the acceptance criteria are met, and adjusting the decision rule or acceptance criteria as necessary.

Now, let’s dive into how to apply the decision rule in calibration results.

The laboratory must first determine whether the measurement result meets the acceptance criteria before applying the decision rule. Assuming the estimation result falls inside the acknowledgment measures, it is viewed as substantial, and no further activity is vital.

The laboratory must decide whether the measurement result is acceptable or not if it does not meet the acceptance criteria. This is accomplished by comparing the measurement result to the decision limit, which is the decision rule’s maximum deviation from the reference value that is acceptable.

The measurement result is deemed acceptable and requires no further action if it falls within the decision limit. The laboratory must take the appropriate action, such as repeating the measurement, investigating the cause of the deviation, or adjusting the measurement method, if the measurement result falls outside the decision limit.

It’s important to remember that the decision rule and acceptance criteria should be checked on a regular basis to make sure they still work well and produce results that are reliable and accurate. Based on the laboratory’s experience and stakeholders’ feedback, modifications to the decision rule or acceptance criteria should be made if necessary.

To sum up, the 5 moves toward execute ISO 17025 choice principles and apply them in adjustment results are:

  • Select the decision rule that is appropriate for the laboratory’s needs and the kind of the measurement being conducted.
  • Establish the acceptance criteria based on the laboratory’s measurement uncertainty and define them in a way that assures trustworthy and accurate findings.
  • Validate the decision rule using a validation study that evaluates a set of calibration findings and compares them to a reference value.
  • Apply the decision rule by incorporating it into the laboratory’s quality management system, training workers on how to use it, and ensuring that it is uniformly implemented across all measurements.
  • Monitor and assess the decision rule’s execution by analyzing calibration results on a regular basis, ensuring that the acceptance requirements are satisfied, and making any required changes to the decision rule or acceptance criteria.

By implementing these five processes, laboratories may verify that their measurement findings are legitimate and consistent, as well as that they suit the needs of their stakeholders. Decision rules are an important aspect of ISO 17025, and laboratories must understand and implement them appropriately in order to deliver trustworthy and accurate findings.

In conclusion, adopting ISO 17025 decision criteria and incorporating them into calibration findings is critical for assuring the dependability and accuracy of a laboratory’s measurement results. Laboratories may generate valid and consistent findings that fulfill the expectations of their stakeholders by following the 5 stages indicated in this blog article and evaluating the decision rule and acceptance criteria on a regular basis.

Call us to discuss your calibration, test or repair needs at:
713.944.3139.

Request for Calibration Quote

Request for PPE/Glove Testing Quote

4 Signs Your Equipment Needs To Be Calibrated

by gcc-admin-alpha

In an industry where data and measurements are primary considerations in daily work, costly equipment is required to ensure accurate and reliable readings. Some people even go so far as to say that scientists are only as good as their tools. As a result, ensuring that your equipment provides accurate readings is critical to your business.

Producing reliable and accurate data is critical because many fields rely on it. This is where equipment calibration comes into play. What exactly is calibration? Calibration is the process of evaluating and adjusting your equipment to ensure precise and consistent results.

In this blog, we will go over some of the most common indicators that your equipment needs to be calibrated, as well as the various types of calibration and which types of equipment are best for each.

1. It is due (Your Schedule Says So):

One of the most common indications that your equipment requires calibration is when your schedule specifies it. It is standard procedure to have your equipment calibrated not only upon purchase but also annually, just as you would have your car inspected. However, this can vary greatly depending on the industry and how the equipment is used. Because of their role and direct impact on quality, some industries and equipment may require calibration more frequently than others.

If your company is certified by a specific industry-standard agency, such as the International Organization for Standardization, this is a great example (ISO). If this is the case, you may be required to follow guidelines for how frequently your equipment must be calibrated, and failure to do so may result in the loss of your certification.

2. Damage/Repairs:

It’s always a good idea to have your equipment calibrated after it’s been damaged or recently repaired, even if the damaged or repaired area wasn’t close to the measurement area. Why? Damage and repairs can unintentionally cause other internal problems or changes. For example, when repairing a piece of equipment, a sensor may be accidentally bumped, or if a tool or gage is dropped, the calibration may be thrown off. Overall, whenever a piece of equipment is damaged or repaired, it is best to take precautions to ensure accurate results and measurements.

3. Your measurements are inconsistent: 

Inconsistent and poor results are probably the second most common indication that your equipment needs to be calibrated. Products that do not meet specifications or machinery that does not operate as intended are two of the most common occurrences in this category. Unexpected outcomes may occur from time to time, so keep an eye out for results that consistently fall outside of specifications.

A great way to combat this is to consistently check and recheck the instrument readings, as well as the quality and specifications of the final products. Overall, if you notice a result that is even slightly out of the norm, especially over time, having your machine calibrated is never a bad idea.

4. It was requested by the customer.:

Customer requests are another reason why equipment must be calibrated. Customers may request that your equipment be calibrated to ensure that they are receiving accurate results, depending on your industry and the services you provide. This will not only help you deliver accurate results for the current customer, but for many more to come. It can also serve as a preventative measure, assisting you to avoid outlier results or catching results that are just outside of the norm. While this is a relatively uncommon reason for equipment calibration, it is something you should be aware of.

Your Calibration Schedule Will Be Managed by Gulf Coast Calibration

Are you looking for calibration services, or is your equipment producing out-of-the-ordinary results? If so, you’ve come to the right place. Gulf Coast Calibration has over 42 years of experience and has grown to become one of the best weighing equipment and calibration companies in the Gulf Coast Region. Our calibration services, which cover equipment in a variety of industries, are provided through our in-house laboratory or on-site at our customers’ facilities.

We take quality very seriously because our clients rely on us to help them provide quality products and services to their customers. As proof of our quality, we are registered and accredited by ISO/IEC 17025, and our calibrations are performed using NIST-traceable standards.

Call us to discuss your calibration, test or repair needs at:
713.944.3139.

Request for Calibration Quote

Request for PPE/Glove Testing Quote

10 Types Of Dimensional Inspection Hand Tools And When To Use Them

by gcc-admin-alpha

Any quality control procedure would be incomplete without the use of hand tools for dimensional inspection. They are used to check if a product or part satisfies the necessary requirements by measuring and inspecting various product or part dimensions. In this post, we’ll look at 10 different kinds of hand tools for dimensional inspection and discuss when to use each one.

1. Calipers:

Calipers are used to measure the distance between two points, as well as thickness and diameter. They are used in a variety of industries, including metalworking, engineering, and woodworking.

2. Micrometers:

Micrometers are used for measuring small distances, thicknesses, and diameters. They are extremely precise and widely used in industries such as manufacturing and quality control.

3. Height gauges: 

Height gauges: Height gauges are used to measure an object’s height, including its vertical distance from a reference plane. They are useful in industries such as construction and manufacturing.

4. Depth gauges:

Depth gauges are used to determine the depth of a hole or recess. They’re useful in woodworking, metalworking, and other industries that require precise depth measurements.

5. Thread gauges:

Thread gauges are used to determine the pitch, diameter, and thread angle of screws, bolts, and other threaded objects. They are used in the manufacturing and quality control processes.

6. Feeler gauges:

Feeler gauges are used to determine the clearance or gap between two parts. They are widely employed in the automotive and aerospace industries.

7. Dial indicators:

Dial indicators are used to determine the distance or movement of an object. They are frequently employed in machining and manufacturing.

8. Surface roughness testers:

Surface roughness testers: These devices are used to determine the roughness or smoothness of a surface. They’re common in industries like automotive and aerospace.

9. Radius gauges:

Radius gauges are used to determine the radius of a curve or surface. They are widely used in woodworking, metalworking, and other industries where precise curve measurements are required.

10. Bore gauges:

Bore gauges are used to determine the diameter of a hole or bore. They are widely used in manufacturing and quality assurance.

The type of measurement required and the industry in which it will be used determine which dimensional inspection hand tool to use. Each tool has advantages and disadvantages, and choosing the right tool is critical for precise measurements.

It is essential to comply with best practices for using dimensional inspection hand tools in addition to knowing which tool to use. Here are some pointers to remember:

Select the appropriate tool for the job: As previously stated, each tool has advantages and disadvantages. When selecting the appropriate tool, consider the type of measurement required as well as the industry in which it will be used.

Zero the tool before use: To ensure accurate measurements, zero the tool before use. When no measurements are being taken, the tool is set to read zero.

Use the tool correctly: Each tool comes with its own set of instructions for use. Follow these steps to ensure precise measurements and avoid damage to the

It is essential to comply with best practices for using dimensional inspection hand tools in addition to knowing which tool to use. Here are some pointers to remember:

  • Select the appropriate tool for the job: As previously stated, each tool has advantages and disadvantages. When selecting the appropriate tool, consider the type of measurement required as well as the industry in which it will be used.
  • Zero the tool before use: To ensure accurate measurements, zero the tool before use. When no measurements are being taken, the tool is set to read zero.
  • Use the tool correctly: Each tool comes with its own set of instructions for use. Follow these steps to ensure precise measurements and avoid damage to the tools.
  • Clean and maintain the tool: Cleaning and maintaining the tool on a regular basis will ensure that it remains accurate and reliable. Follow the cleaning and maintenance instructions provided by the manufacturer.
  • Regularly calibrate the tool: Even with proper use and maintenance, dimensional inspection hand tools can lose accuracy over time. Calibration on a regular basis can ensure that the tool remains accurate and reliable.

The type of measurement required and the industry in which it will be used determine which dimensional inspection hand tool to use. Each tool has advantages and disadvantages, and choosing the right tool is critical for precise measurements.

You can ensure that your dimensional inspection hand tools provide accurate and reliable measurements by following these guidelines. To get the best results, choose the right tool for the job, use it correctly, and maintain it on a regular basis.

Conclusion

Finally, dimensional inspection hand tools are critical for quality control in a wide range of sectors. Knowing which tool to use and how to use it accurately can help ensure that your measurements are precise as well as consistent. You can ensure that your quality control process is effective and efficient by following best practices for using dimensional inspection hand tools.

Call us to discuss your calibration, test or repair needs at:
713.944.3139.

Request for Calibration Quote

Request for PPE/Glove Testing Quote
Difference Between Dial Calipers and Digital Calipers

by gcc-admin-alpha

Calipers are precision measuring tools that are used in many industries such as manufacturing, engineering, and metalworking. They come in a variety of shapes and sizes, but the dial caliper and digital caliper are two of the most common. In this blog post, we’ll go over the key distinctions between the two and when to use each.

Dial Caliper:

A dial caliper, also known as a Vernier caliper, is an old-fashioned measuring tool that has been around for a long time. It is made up of a scale with a pointer that moves along the scale as the jaws open and close. The scale is usually marked in 0.001 inch or 0.02 mm increments, allowing for precise measurements.

The dial caliper has the advantage of being easy to read and not requiring any batteries or electronics. It’s also tough and can withstand extreme temperatures. It may, however, be more difficult to read for those with visual impairments, and it may not provide measurements with the same precision as a digital caliper.

Digital Caliper:

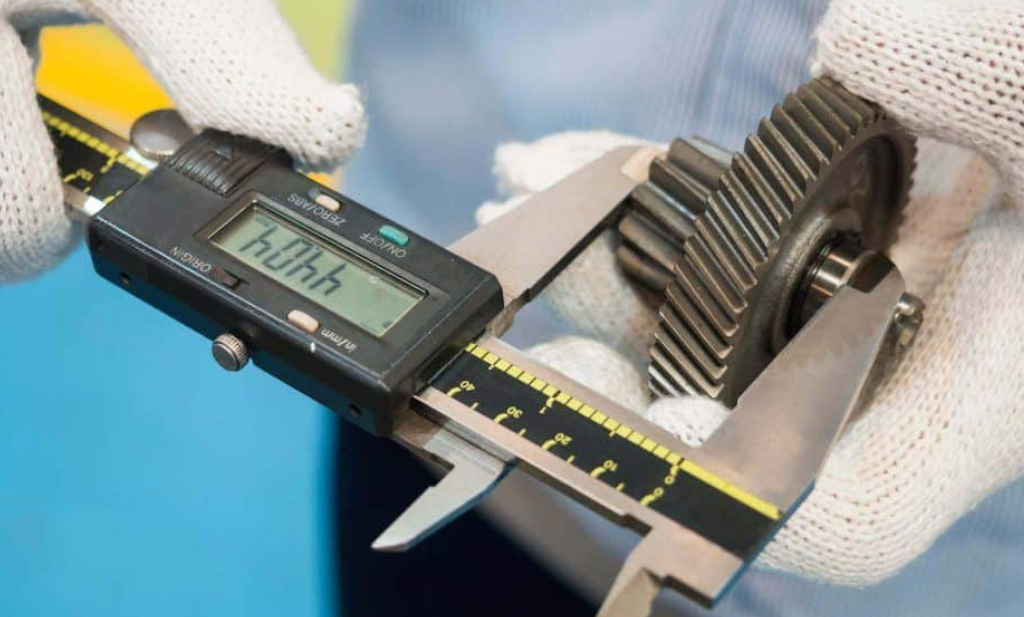
In contrast, a digital caliper is a more modern measuring tool that uses electronics to provide highly accurate measurements. It has a digital readout that displays the measurement in inches or millimeters, with some models also displaying fractions. Digital calipers’ jaws are typically made of stainless steel and can measure internal, external, depth, and step dimensions.

A digital caliper’s benefits include its ease of use, accuracy, and ability to display measurements in a variety of units. It’s also great for people who need to take measurements quickly or have trouble reading the scale of a dial caliper. It does, however, require batteries, and the electronic components may not be as long-lasting as the mechanical components of a dial caliper.

Here are some additional differences between dial calipers and digital calipers:

  • Price: In general, dial calipers are less expensive than digital calipers. If you’re on a tight budget or only need a caliper occasionally, a dial caliper may be a better option.
  • Resolution: Digital calipers usually have a higher resolution than dial calipers. Some digital calipers, for example, can measure to within 0.0005 inches or 0.01 mm, whereas dial calipers may only measure to within 0.001 inches or 0.02 mm.
  • Ease of use: In general, digital calipers are easier to use than dial calipers, especially for beginners. Without having to count the marks on the scale, the digital readout makes it simple to read the measurement. Some people, however, may prefer the tactile feedback of a dial caliper.
  • Battery life: Digital calipers are powered by batteries, which can be inconvenient if the battery dies in the middle of a job. Many digital calipers, on the other hand, have a long battery life and some even have an auto-off feature to conserve battery power.
  • Range: Digital calipers typically have a greater measurement range than dial calipers. Some digital calipers, for example, can measure up to 12 inches or 300 mm, whereas dial calipers may only measure up to 6 inches or 150 mm.
  • Accuracy: Digital calipers are generally more accurate than dial calipers, especially when measuring with high precision. This is due to the greater accuracy with which digital calipers can display measurements, as well as the elimination of human error that can occur when reading the markings on a dial caliper.
  • Speed: Because digital calipers provide an instant digital readout, they are faster to use than dial calipers. This makes them ideal for tasks requiring a large number of measurements to be taken quickly, such as in a manufacturing environment.
  • Durability: Because dial calipers have fewer moving parts and do not rely on electronic components, they are generally more durable than digital calipers. However, this can vary depending on the caliper’s quality.
  • Maintenance: Because digital calipers contain electronic components that must be protected from moisture and dust, they require more maintenance than dial calipers. This can include routine cleaning, battery changes, and calibration on occasion.
  • Environment: Because dial calipers do not have electronic components that can be damaged by dust or moisture, they are better suited for use in dirty or dusty environments such as a machine shop. Digital calipers are better suited for use in clean environments where accuracy and speed are more important than durability, such as a laboratory or inspection room.
  • Display: Dial calipers have an analog display that shows the measurement in the form of a pointer and a scale, whereas digital calipers have a digital display that shows the measurement in numbers. For some people, especially those who are used to working with digital displays, this can make digital calipers easier to read.
  • Zero reset: Most digital calipers have a zero reset button that allows you to reset the measurement to zero without physically moving the caliper’s jaws. This is a useful feature if you need to take multiple measurements and want to start each one from the beginning.
  • Data output: Some digital calipers include a data output feature that allows you to connect the caliper to a computer or other device and record measurements.
  • Brand & Quality: Both dial and digital calipers are available in a variety of brands and quality levels. Higher-quality calipers are generally more accurate and durable, but also more expensive. It is critical to select a caliper that is appropriate for your needs and budget, as well as a reputable brand with a proven track record.
  • Units of measurement: Digital calipers have the ability to switch between different measurement units, such as inches, millimeters, and fractions. In contrast, dial calipers are typically calibrated in only one unit of measurement and cannot be easily switched.

Conclusion

In conclusion, both dial and digital calipers have advantages and disadvantages. Dial calipers are more traditional and less expensive, but they can be more difficult to read and have a lower resolution. Digital calipers are more user-friendly and have a higher resolution, but they require batteries and may be more expensive. Finally, the decision between the two boils down to personal preference and the specific requirements of the job.

Call us to discuss your calibration, test or repair needs at:
713.944.3139.

Request for Calibration Quote
Request for PPE/Glove Testing Quote

Dimensional Tools and Thier Common Defects

by gcc-admin-alpha

Dimensional tools are critical tools for ensuring precise measurements in manufacturing and engineering processes. These tools are used to measure dimensions such as length, width, and thickness to ensure that products and components meet specific specifications. Dimensional tools, like any other tool, can have flaws that cause inaccurate measurements or cause the tool to malfunction.

This blog post will go over the most common defects that can occur in dimensional tools and how to avoid them.

Wear and Tear

Wear and tear is one of the most common defects on dimensional tools. Regular use or exposure to harsh conditions can cause tools to wear out over time. This can result in inaccurate measurements and even irreparable damage to the tool.

How to Prevent:

To avoid wear and tear, use the proper tool for the job and handle it with care. Regular maintenance and cleaning can also help your tools last longer.

Damage

Another common defect on dimensional tools is physical damage. Accidental drops, mishandling, and other types of trauma can cause misalignment or other types of defects that affect the tool’s accuracy.

How to Prevent:

To prevent damage, it’s crucial to handle tools with care and store them properly when not in use. Protective cases or covers can also help prevent damage during transport or storage.

Calibration Issues

Dimensional tools must be calibrated on a regular basis to ensure accurate measurements. Calibration issues are a common flaw that, if not addressed, can cause serious problems.

Calibration problems can be caused by a variety of factors, including wear and tear, damage, or temperature or humidity changes.

How to Prevent:

Calibration issues can be avoided by following the manufacturer’s calibration guidelines and ensuring that tools are calibrated on a regular basis.

Digital Display Issues

Digital dimensional tools, such as calipers or micrometers, may exhibit display issues. This can include a dim or flickering display, inaccurate readings, or other issues.

Battery issues, display damage, or other technical issues can all cause display issues.

How to Prevent:

To avoid display problems, keep tools clean and dry, and replace batteries on a regular basis.

Rust and Corrosion

Rust and corrosion are another common problem with dimensional tools. Metal tools are prone to rust and corrosion, especially if they are exposed to moisture or other corrosive substances.

How to Prevent:

To avoid rust and corrosion, keep tools in a dry, clean, and well-ventilated place. Cleaning and oiling on a regular basis can also help to prevent rust and corrosion.

Improper Handling and Use

Improper handling and application of dimensional tools can also result in flaws. This can include using the incorrect tool for the job, using too much force, or using the tool incorrectly.

How to Prevent:

It’s critical to use the right tool for the job and follow the manufacturer’s guidelines for use to avoid defects caused by improper handling and use. Proper training and education can also aid in the prevention of defects caused by human error.

Loose Fittings and Parts

Finally, loose fittings and parts can cause dimensional tool defects. This can include loose screws, bolts, or other fasteners that impair the accuracy and stability of the tool.

It is critical to inspect tools on a regular basis and tighten any loose fittings or parts to avoid loose fittings and parts.

How to Prevent:

Regular maintenance and cleaning can also aid in the prevention of loose fittings and parts.

Conclusion

Finally, precision engineering and manufacturing require dimensional tools. They are, however, susceptible to a variety of flaws that can impair their accuracy and reliability. Understanding these common flaws and taking preventative measures will ensure that your tools remain accurate and reliable for years to come. Regular maintenance, cleaning, and calibration are required to keep your dimensional tools in excellent working order.

Call us to discuss your calibration, test or repair needs at:
713.944.3139.

Request for Calibration Quote

Request for PPE/Glove Testing Quote

Calibration of Dimensional Tools: Ensuring Accuracy and Precision

by gcc-admin-alpha

In manufacturing and other industries, dimensional tools are used to take precise measurements of objects and materials. These tools are crucial for ensuring that products meet required specifications and quality standards. However, for these tools to provide accurate measurements, they need to be calibrated regularly.

Calibration is the process of comparing the measurements of a tool to a standard of known accuracy. Calibration ensures that the tool is functioning correctly and that its measurements are precise and accurate. In this blog post, we’ll discuss why dimensional tool calibration is important, how it’s done, and some common methods and tools used in calibration.

What is the significance of calibration?

Calibration is crucial for ensuring that dimensional tools are operating correctly and delivering accurate results. Failure to calibrate a tool can result in significant consequences for manufacturing processes, safety, and costs. Here are some reasons why calibration is important:

  • Accurate measurements are essential

When dimensional tools are not calibrated, their measurements can be inaccurate. Inaccurate measurements can lead to the production of defective products or components, which can have serious consequences. For example, a poorly calibrated dimensional tool can cause the production of parts that are too small, leading to malfunctions and possible safety issues.

  • Manufacturing processes can be impacted

Inaccurate measurements can lead to costly delays in manufacturing processes. If a dimensional tool is not calibrated, the production process may have to be stopped, and the tool recalibrated. This can lead to lost time and production costs. Regular calibration of dimensional tools ensures that they are functioning correctly and that the manufacturing process is efficient.

  • Safety concerns can arise

Inaccurate measurements can also pose safety concerns. For example, if a dimensional tool is not calibrated, it can lead to the production of parts that do not fit correctly or are too small. This can result in malfunctions or accidents that can cause injuries or fatalities.

How to Perform Dimensional Tool Calibration

Calibration of dimensional tools is a process that involves comparing the measurements of the tool to a standard of known accuracy. The process involves the use of calibration equipment, such as calibration blocks, gauge blocks, and micrometers. Here’s how it’s done:

  • Preparing for calibration:
    Before calibration, the dimensional tool must be cleaned and inspected for any damage. It’s also important to ensure that the calibration equipment is clean and in good condition.
  • Performing calibration:
    The calibration process involves comparing the measurements of the dimensional tool to a standard of known accuracy. The process typically involves the following steps:
    * Choose a calibration standard that is appropriate for the tool being calibrated.
    * Compare the tool’s measurements to the standard’s measurements, and record the differences.
    * Make any necessary adjustments to the tool to ensure that its measurements are accurate.
    * Repeat the process until the tool’s measurements match the standard’s measurements.
  • Testing the calibrated tool:
    Once the tool has been calibrated, it’s essential to test its accuracy. Testing involves taking measurements using the calibrated tool and comparing them to the measurements of the calibration standard. If the measurements are within the acceptable range, the tool is considered calibrated.

Common Methods and Tools Used in Calibration

There are several common methods and tools used in dimensional tool calibration. Here are a few:

  • Gauge Blocks:
    Gauge blocks are precision blocks of steel, ceramic, or carbide that have been machined to a specific length with very high accuracy. These blocks are used as a reference standard for the calibration of dimensional tools, such as micrometers and calipers. Gauge blocks come in different sizes and shapes and can be used in a variety of configurations to calibrate different types of dimensional tools.

    Gauge blocks are used in the process of direct measurement, where the tool being calibrated is placed in direct contact with the gauge block. The accuracy of the gauge block is determined by its manufacturing process, which uses sophisticated machining equipment and techniques.

  • Micrometers:
    Micrometers are commonly used for the measurement of small distances, with an accuracy of up to a thousandth of an inch. Micrometers are used to measure the thickness of materials, the depth of holes, and the diameter of objects.

    Micrometers work by using a calibrated screw mechanism to move a spindle towards a measuring surface. The movement of the spindle is proportional to the distance being measured. Micrometers can be used in a variety of configurations, including inside micrometers, outside micrometers, and depth micrometers.

    Micrometers require careful handling and are susceptible to damage from shock, vibration, and environmental factors. Regular calibration of micrometers is essential to ensure their accuracy and to prevent damage to the tool.

  • Calipers:
    Calipers are used to measure the distance between two points on an object. They are commonly used in manufacturing, engineering, and construction. Calipers come in two types: inside calipers and outside calipers.

    Inside calipers are used to measure the diameter of holes, while outside calipers are used to measure the diameter of objects. Calipers work by using two jaws that are adjusted to fit around the object being measured. The distance between the jaws is then measured on a scale.

    Calipers can be used in different configurations, including dial calipers, digital calipers, and vernier calipers. The accuracy of calipers is determined by their manufacturing process and the calibration of their measuring scale.

  • Optical Comparators:
    Optical comparators are used to measure the dimensions of objects by projecting an image of the object onto a screen. The image is magnified, and measurements are taken using a calibrated scale.

    Optical comparators are often used for measuring complex parts that cannot be measured using conventional dimensional tools. The accuracy of optical comparators depends on the resolution of the measuring scale and the magnification of the image.

  • CMMs:
    Coordinate measuring machines (CMMs) are computer-controlled machines used for high-precision dimensional measurements. CMMs work by using a probe to take measurements of an object in three dimensions.

    CMMs can be used to measure the dimensions of complex objects with high accuracy and repeatability. CMMs are often used in industries such as aerospace, automotive, and medical devices.

Conclusion

Calibration is an essential process for ensuring that dimensional tools are providing accurate and precise measurements. There are several common methods and tools used in calibration, including gauge blocks, micrometers, calipers, optical comparators, and CMMs. The selection of the appropriate method and tool depends on the type of tool being calibrated and the level of accuracy required. Regular calibration of dimensional tools is crucial to ensure their accuracy and reliability.

Call us to discuss your calibration and repair needs at:
713.944.3139.

Request for Calibration Quote

Request for PPE/Glove Testing Quote
How to Use an Ice Bath to Check the Accuracy of Your IR Thermometer- IR Thermometer Calibration Procedure

by gcc-admin-alpha

Infrared thermometers, also known as IR thermometers, are widely used to measure the temperature of objects and surfaces. These devices are known for their speed, accuracy, and convenience, but it is important to periodically verify the accuracy of your IR thermometer to ensure that it is providing reliable temperature readings. In this blog post, we will discuss how to verify the accuracy of your IR thermometer using an ice bath and the IR thermometer calibration procedure.

Why Calibrate Your IR Thermometer?

Calibrating your IR thermometer is important to ensure that you are getting accurate temperature readings. IR thermometers use a lens to focus the infrared energy emitted by an object onto a temperature sensor. Over time, the lens may become dirty, scratched, or damaged, which can affect the accuracy of the temperature readings. In addition, the temperature sensor may drift due to changes in ambient temperature or humidity, which can also impact the accuracy of the readings.

By regularly calibrating your IR thermometer, you can ensure that it is providing accurate temperature readings. This is particularly important for applications that require precise temperature measurements, such as cooking, HVAC, and industrial processes.

The Ice Bath Calibration Procedure

The ice bath calibration procedure is a simple and effective way to verify the accuracy of your IR thermometer. Here are the steps to follow:

  1. Fill a container with ice and water. Stir the water until it reaches a homogeneous temperature, which is typically close to 32ยฐF (0ยฐC).
  2. Immerse the temperature sensor of your IR thermometer into the ice bath, making sure that it is fully submerged.
  3. Turn on your IR thermometer and aim it at the surface of the ice bath.
  4. Take a temperature reading and compare it to the known temperature of the ice bath, which is 32ยฐF (0ยฐC).
  5. If the reading is different from the known temperature, adjust the calibration of your IR thermometer to match the ice bath temperature. This can usually be done using the menu settings on the device.
  6. Repeat the process a few times to ensure that the IR thermometer is providing accurate and consistent temperature readings.

Tips for Accurate Ice Bath Calibration

Here are a few tips to keep in mind to ensure accurate ice bath calibration:

  1. Use a large enough container of ice and water to ensure that the temperature of the ice bath is homogeneous.
  2. Stir the water in the ice bath to help it reach a homogeneous temperature.
  3. Immerse the temperature sensor of your IR thermometer fully into the ice bath to ensure that it is getting a representative temperature reading.
  4. Avoid touching the lens of your IR thermometer during the calibration procedure, as this can affect the accuracy of the temperature readings.
  5. Repeat the calibration procedure a few times to ensure that the IR thermometer is providing accurate and consistent temperature readings.

Conclusion

Verifying the accuracy of your IR thermometer using an ice bath is a simple and effective way to ensure that it is providing reliable temperature readings. By following the steps outlined in this blog post, you can ensure that your IR thermometer is providing accurate temperature readings for all your applications. Don’t forget to calibrate your IR thermometer regularly to ensure that it is providing accurate temperature readings over time.

Call us to discuss your calibration and repair needs at:
713.944.3139.

Request for Calibration Quote

Request for PPE/Glove Testing Quote
The Key Factors Affecting Calibration

by gcc-admin-alpha

Proper instrument calibration is important to prevent potential error sources from degrading the result. Several factors can occur during and after a calibration that can affect its result. Among these are:

Using The Wrong Calibrator Values

It is important to closely follow the instructions for use during the calibration process. Disregarding the instructions and selecting the wrong calibrator values will โ€œteachโ€ the instrument incorrectly, and produce significant errors over the entire operating range. While many instruments have software diagnostics that alert the operator if the calibrators are tested in the incorrect order (i.e. Calibrator 2 before Calibrator 1), the instrument may accept one or more calibrators of the wrong value without detecting the operator error.

Calibrator Formulation Tolerance

It is important to use calibrators that are formulated to tight tolerance specifications by a reputable manufacturer. There is a tolerance associated with formulating a calibrator/control due to normal variations in the instrumentation and quality control processes. This tolerance can affect the mean value obtained when using the calibrator. For example, if the calibrators have nominal values of 50 and 850 mOsm/kg H2O, and were manufactured toward the low end of their allowable range, the net effect might be to lower the calibration curve by approximately several mOsm/kg H2O over the calibrated range.

As an example, Figure 3 illustrates what can happen in a situation where Calibrator 2 is assumed to be at its nominal value, say 850 mOsm/kg H2O, when the true formulated value is 846. The calibration process โ€œteachesโ€ the instrument incorrectly that 846 is actually 850, thus raising the Actual Results curve higher than it would be if the instrument were โ€œtaughtโ€ that Calibrator 2 was 846 mOsm/kg H2O, or Calibrator 2 had an actual formulation value of 850 mOsm/kg H2O.

Sample Preparation Technique

As in the case of normal testing, good sample preparation technique is essential to obtaining the best performance from the calibration process. A similar situation to that depicted in Figure 3 can occur if good sample preparation techniques are not followed when providing the calibrator samples. Conditions such as pipeting different sample volumes, allowing air bubbles in the samples, or preparing the samples too early so that evaporation occurs, can all increase the variation in the results obtained from the calibrators tested in the calibration process.

This increased variation can result in mean values for the calibrators that vary by several mOsm/kg H2O from what they should be, erroneously shifting the calibration curve, resulting in increased errors for all results.

Ambient Temperature Effects

It is important to periodically calibrate an instrument at a temperature close to that at which it will be operated. Even when a calibration is performed properly, there are other factors that can affect the accuracy of results. Environmental factors, such as the ambient temperature, can introduce errors that may not be readily evident when testing samples with unknown values.

Components, such as electronics, used in an instrument may be affected by changes in operating temperature. If an instrument is calibrated at one temperature and then operated at a significantly different temperature, the temperature-induced error can also degrade the resultsโ€™ accuracy.

Call us to discuss your calibration and repair needs at:
713.944.3139.

Request for Calibration Quote

Request for PPE/Glove Testing Quote
Understanding ISO 9001 Calibration Requirements

by gcc-admin-alpha

ISO 9001 is a quality management system for manufacturers (product producers) and service providers. Other more specific standards exist for specialized industries such as automotive, pharmaceuticals, and Oil and Natural Gas, but ISO 9001 remains integrated with them.

In order for a calibration process to be properly implemented, we must have in-house calibration management.

What is calibration and why do we need calibration?

Read up on our previous post >> What is Calibration and Reason for Calibration

Calibration management is governed by ISO 9001: 2015 Standards, which include specific clauses outlining the requirements for proper implementation.

ISO 9001 Calibration Requirements

What are the ISO 9001 Calibration requirements? The related clauses where calibration requirements are provided are listed below. These are the clauses with calibration requirements that have a direct impact on the calibration results:

  1. Clause 7.1.2 People.
  2. Clause 7.1.4 Environment for the operation of processes.
  3. Clause 7.1.5.1 General monitoring and measuring requirements
  4. Clause 7.1.5.2 Measurement traceability.
  5. Clause 7.2 Competence.
  6. Clause 9.1.1 General requirements for monitoring, measurement, analysis, and evaluation

For our publication, we highlight only 3 of the clauses listed above.

Clause 7.1.4 Environment for the operation of processes

This clause necessitates the monitoring and control of the environment in order for calibration to be performed correctly. Environmental conditions that influence the final output of calibration results should be monitored and controlled, as per ISO 17025 requirements.

The following are some examples of environmental conditions that we must monitor and control:

Temperature
Humidity
Vibrations
Dust
Proper lighting
Not all of the items listed above must be controlled at the same time in a lab. This is determined by the criticality and the impact it can have on the calibration process.

Temperature and humidity are the two environmental conditions that are always controlled because almost all instruments require them for proper operation, as detailed in their specifications.

Clause 7.1.5. monitoring and measuring requirements

Monitoring and measuring instruments are instruments that we use to perform measurements.
โ€œIt is either we perform a measurement to monitor and control a process or we perform measurement for verification of the output of our process.โ€
Keeping this in mind, all monitoring and measurement instruments should be controlled.

The control provided are:

  • The instrument to be used should be suitable. Suitable means it covers the range and accuracy requirement. For every monitoring and measuring instrument we use, we should ensure that the usable range can be covered and as much as possible, it has higher accuracy than the process to be measured. Recommended is to maintain the Test Uncertainty Ratio.
  • Every monitoring and measuring instrument should be maintained to ensure confidence while using or within its calibration interval. Maintained means:

a. Properly monitored for its statuses like locations, labels, and calibration due dates.

b. Preventive maintenance is performed

c. Intermediate check is performed.

Records of Implementation of the above requirements should be maintained that can be used as evidence of implementation during audits.

Clause 7.2 Competence

As defined by ISO 19011, competence is: โ€œdemonstrated personal attributes and demonstrated ability to apply knowledge and skills โ€œ.

Clause 7.2 and 7.1.2, which is about how people relate to each other. ISO 9001 clause 7.1.2 requires that โ€œThe organization shall determine and provide the persons necessary for the effective implementation of its quality management system and for the operation and control of its processes.โ€

In relation to calibration, the People, which are the personnel involved in performing calibration should be competent or have the necessary competency.

Personnel Competency is one of the main requirements that we must meet. All factors that influence the quality of calibration performed depend on the knowledge, skills, experience, and education of Personnel.

You may have a high-end calibrator, a good calibration procedure, and a well-equipped facility but the person in charge is not suitable for the calibration activity performed, then the calibration results may be invalidated.

To be competent means the technician:

1. Has the necessary competence requirements such as appropriate education, training, or experience;

2. Passed the competency evaluation

3. Is authorized to perform important laboratory activities

4. Has monitored competency and continued education

ย 

All the records and recorded information resulted from this process should be maintained and used as evidence of competency.

Call us to discuss your calibration and repair needs at:
713.944.3139.

Request for Calibration Quote
Request for PPE/Glove Testing Quote

Pressure: Definition and Types Explained

by gcc-admin-alpha

Pressure: Definition and Types Explained

It is not immediately evident that we live in a world where pressure is applied to every inch of our body (about 14.7 pounds per square inch at sea level). This was recognized in the 17th century by Evangelista Torricelli. โ€œWe live submerged at the bottom of an ocean of the element air,โ€ he explained. Barometric pressure refers to the pressure exerted by the atmosphere in our gravitational field, which is an absolute pressure that varies with different weather systems. Because the slightly incompressible fluids in our body exert an equal and opposite pressure, we donโ€™t feel this great amount of pressure.Different instruments will require a different calibration process. For example, a calibration lab will calibrate sensors differently from thermometers. Often, you can hire experts to come to your facility to calibrate the equipment, or you can send the equipment to a lab for calibration.Different instruments will require a different calibration process. For example, a calibration lab will calibrate sensors differently from thermometers. Often times, you can hire experts to come to your facility to calibrate the equipment, or you can send the equipment to a lab for calibration.

A force exerted perpendicular to an objectโ€™s surface per unit area is known as pressure. P = F/A is the mathematical formula, with P denoting pressure, F denoting force, and A denoting area. Pressure is a scalar quantity, meaning it has only magnitude and no directional vector properties. In practice, we can consider it as a force that operates equally on all surfaces to which it is exposed and is caused by the collective energy of the gas or liquid that touches that surface. Absolute and gauge pressures are distinguished by the pressure to which they are compared, which is known as the reference pressure.

For someone new to pressure measurement, the standard nomenclature used to describe the physical characteristic of a pressured system can be a little confusing. When selecting a pressure gauge, pressure controller, or calibrator, as well as a pressure transmitter, transducer, or sensor, knowing the standard terminology gives a common vocabulary that ensures you get exactly what you want. A discrepancy between the calibrated and the calibrator will also be eliminated.

The ambient atmospheric pressure is used as the gauge pressureโ€™s reference. The standard for absolute pressure is an absolute vacuum. In a way, theyโ€™re both reading the difference between the reference pressure and the applied pressure. The reference pressure for gauge pressure, on the other hand, may fluctuate based on the current atmospheric pressure.

When a vessel is exposed to atmospheric pressure, we may wish to ensure that the vessel does not explode or implode. In this scenario, we can use a gauge pressure sensor with the reference exposed to air pressure to measure the difference between the ambient pressure and the internal pressure of the tank.

Types of Pressure

  • Differential pressure is the comparison of two different pressures. In essence, because they compare one pressure to another, all pressure measurements are differential. Differential pressure is used to assess flow in a pipeline, level, density, and even temperature, and is normally recorded at elevated line pressures.
  • Vacuum pressure, like gauge pressure, is a measure of pressure below atmospheric pressure and is stated as a positive number.
  • Bidirectional pressure, also known as gauge pressure, uses atmospheric pressure as a reference but measures pressure above atmospheric pressure as a positive pressure and pressure below atmospheric pressure as a negative pressure.

Call us to discuss your calibration needs at:
713.944.3139.

Request for Calibration Quote
Request for PPE/Glove Testing Quote